Light
Every new Cheetah3D document already has one default light source: The camera light. The camera light is a point light with constant attenuation at the position of the camera. This camera light will not appear in the object browser. The camera light should be sufficient for most modelling jobs.
However, if you want to create your own lighting environment you have to use light objects. You can add as many light sources to your scene as you want but only the first 8 lights in the scene will be used in the 3D preview. The renderer works with all light sources.
Properties
- Axis: The direction in which the light source casts. If you plan to animate your light source the "-Z" direction is probably the best.
- Light type: There are various light type available in Cheetah3D.
- Ambient: Add an ambient term to the scene using this property. If a light has an ambient term, the parts of an object facing away from the light source will also be illuminated.
- Area: The area light simulates a rectangular light source. Due to the fact that some pixels in the scene are just partially illuminated by the area light the area light creates soft shadows at these pixels and not hard shadows like the point light.
- Distant: The distant light emits parallel light rays. Due to the fact that the sun is far away from the earth, the light emitted by the sun can be assumed as being parallel on the earth. The distant light object can be used nicely to light outdoor scenes which are in nature illuminated by the sun.
- Point: The point light is probably the most widely used light source. It emits light into all directions like a light bulb for example.
- Spot: The spot light is quite similar to the point light with the small difference that you can limit the illuminated area to a small region, the spot.
- Color: The color of the light source.
- Intensity: The intensity of the light source.
- Samples: Number of samples at which the area light will be evaluated. The more samples you use the smoother the shadows will become. See the images below for a visual example. For most scenes 16-32 samples should be optimal. Using considerable less or more samples will have a negative influence on the rendering time.

 samples = 4
The shadow is still quite noisy.samples = 16
There is almost no noise in the shadow anymore. - Attenuation: The attenuation describes how fast the light intensity decreases. In nature, light intensity decreases proportionally to 1/r^2 with r as the distance between the object and the light source. In computer graphics there are other attenuation functions that are also widely used, however.
- Clamp attenuation: If the attenuation is set to 1/r or 1/r^2 the light intensity increases infinitely the closer you get to r=0. To avoid that effect you can clamp the light with that property and avoid the explosion in light intensity. But be aware that the light won't be physically correct anymore if you use that property.
- MIS: Turns on MIS (Multiple Importance Sampling). MIS only works in the Falcon renderer.
- Shape: Shape of the area light.
- Width: The width of the area source.
- Height: The height of the area light source.
- Radius: The radius of the area light source.
- Normalize: Turn this property on if you want the area light intensity to be independent from the size of the light.
- Visible in camera: Makes the shape of the light source visible when you want reflections to show in the surfaces of objects. This is especially desirable for most studio lighting scenes.
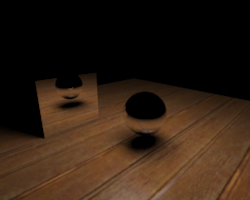
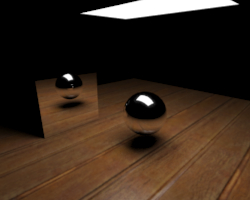 Visible in camera = off
The area light geometry is invisible.Visible in camera = on
The area light is visible.- Spot type: Create either a round or a square spot light.
- Cut of angle: The cut off property constrains the directions in which a spot light source can illuminate.
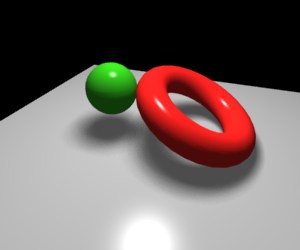
- Smooth cut off: Increasing the smooth cut off property makes the edges of a spot light smoother. See images below for an example of this in action.
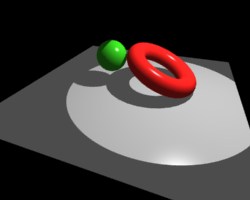
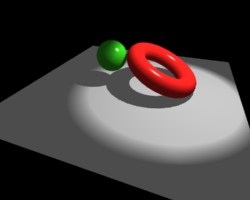 Smooth cut off = 0.0Smooth cut off = 5.0
- Aspect ration: Sets the aspect ratio of the spot.
- Texture: When using a texture on a spot light it works like a film projector.
- Shadow type: Use this property to choose the shadow calculation type. See the images below to understand the various types. Don't forget to also turn on the shadow property of the camera object, otherwise no shadows will be calculated.
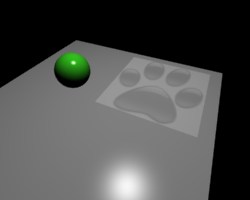
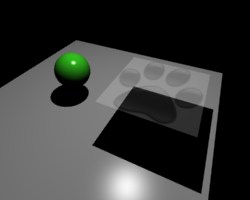
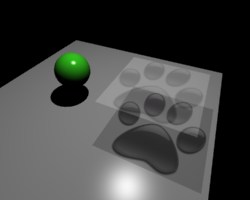 none:
none:
no shadowsraytrace:
The ball casts a shadow correctly, but not the slideraytrace+trans:
The slide now casts it's shadows correctly.This is the most CPU intensive shadow type, so only use it when necessary.- Shadow color: The color of the shadow.
- Caustic photons: The number of caustic photons which will be shot into the scene to render caustics. The more photons you shot the sharper the caustic will become.
- Pure photon light: The light source only shots photons into the scene but it doesn't illuminate the scene directly. This can be helpful if you need more photons for rendering a high quality caustic.