Adobe Illustrator to Cheetah3D
In this tutorial, you will learn how to use your 2D vector artwork done with Adobe Illustrator in Cheetah3D. But you can also use any other 2D vector drawing application which supports the PDF or SVG file format.
Attention: This tutorial assumes that you are a experienced Illustrator user. So it only explains the necessary step which have to be done to export 2D drawings which can be imported and further processed by Cheetah3D.
|
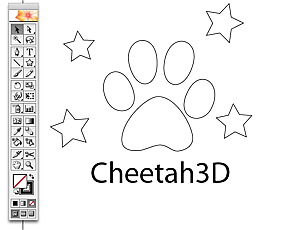
1. Create your artwork in Adobe Illustrator But you can also use some other artwork from your portfolio of course. |
|
|
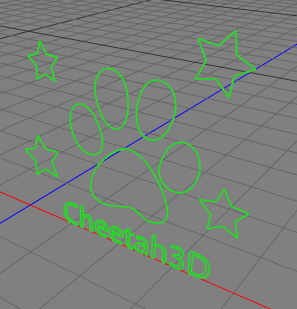
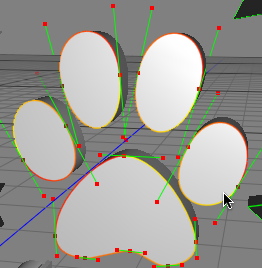
2. Make compound paths Lets start with the paw group. Select all five paths which build up the paw (see image). Than call the "Make Compound Path" command from the context menu. Process the same steps with the other two groups. Please also use the "Make Compound Path" command if the group just consist of one object since that command guarantees that primitives like circles, rects or text are actually transformed into paths. This is necessary because the SVG or PDF file loader in Cheetah3D only imports path information. |

|
|
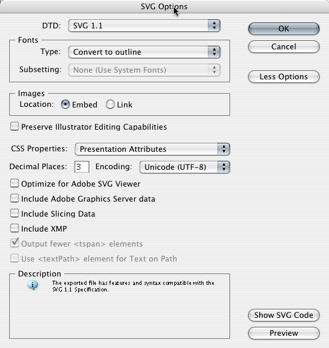
3. Export as PDF or SVG To do that use the "Save As" command from the File menu. In the opening save panel choose the "SVG (svg)" or "Adobe PDF" export. In case of the SVG export please use the options seen on the screenshot. |

|
|
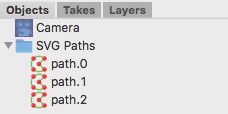
4. Load the SVG/PDF file into Cheetah3D The paths you've created with Illustrator should now appear in the 3D view and in the object browser. If the paths you've created are very big it is possible that you have to zoom back the camera to see them. |
|
|
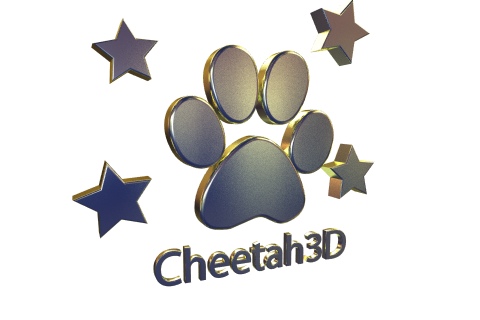
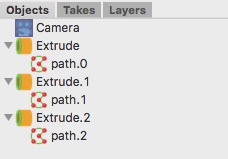
5. Going from 2D to 3D Since our logo contains 3 paths we need 3 Extrude objects. So please create them and drag and drop into each Extrude object one path. |
|
|
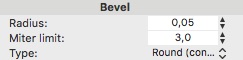
6. Doing some fine tuning |
|
|
After applying some materials which was explained in an earlier tutorial you are done. |
|